

How to make a DIY project with a paint can?
May 19, 2025
DIY projects have always been a fantastic way to express creativity, save money, and add a personal touch to your living space. One often-overlooked item that can serve as an excellent base for DIY projects is the humble paint can. As a paint can supplier, I've seen firsthand the incredible potential these cans hold beyond their original purpose of holding paint. In this blog post, I'll guide you through the process of making a DIY project with a paint can, from choosing the right can to adding the final touches.
Step 1: Choosing the Right Paint Can
The first step in any DIY project is selecting the appropriate materials. When it comes to paint cans, there are several options to choose from, each with its own unique characteristics.
If you're looking for a sturdy and durable option, consider a Clsoed Metal Drun. These cans are typically made of thick metal and are designed to withstand heavy use. They come in various sizes, making them suitable for a wide range of projects, from small organizers to large planters.
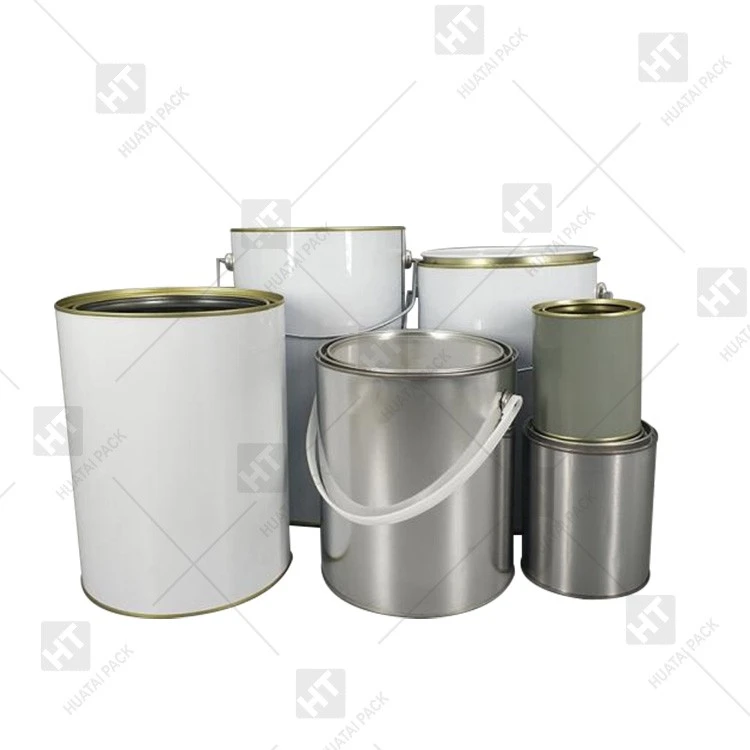
For a more traditional look, Round Metal Tin Paint Cans are a great choice. These cans are often coated with a layer of paint or enamel, giving them a smooth and shiny finish. They are also relatively lightweight, making them easy to handle and move around.
If you're working on a smaller project or need a can with a more compact size, Small Round Metal Can might be the perfect fit. These cans are ideal for creating small storage containers, jewelry holders, or even decorative items.
Step 2: Preparing the Paint Can
Once you've chosen the right paint can for your project, it's time to prepare it for use. Start by cleaning the can thoroughly to remove any dirt, dust, or paint residue. You can use a mild detergent and water to clean the can, or you can use a specialized metal cleaner for a more thorough clean.
After cleaning the can, dry it completely with a clean cloth. If the can has any sharp edges or rough spots, you can use a file or sandpaper to smooth them out. This will help prevent any injuries while working on the project and give the can a more professional look.
Step 3: Planning Your DIY Project
Before you start painting or decorating the can, it's important to have a clear idea of what you want to create. Take some time to brainstorm ideas and sketch out a rough design on paper. Consider the purpose of the project, the style you want to achieve, and the materials you'll need.
If you're new to DIY projects, you might want to start with a simple design and gradually work your way up to more complex ones. There are plenty of online resources and tutorials available that can provide inspiration and guidance for your project.
Step 4: Painting the Can
Painting the can is one of the most important steps in the DIY process, as it will determine the overall look and feel of the project. Before you start painting, make sure to choose the right type of paint for your can. For metal cans, it's best to use a paint that is specifically designed for metal surfaces, such as enamel paint or spray paint.
If you're using spray paint, make sure to apply it in a well-ventilated area and follow the instructions on the can carefully. Start by applying a thin coat of paint and allowing it to dry completely before applying additional coats. This will help prevent the paint from dripping or running and ensure a smooth and even finish.
If you're using enamel paint, you can apply it with a brush or a roller. Make sure to apply the paint in thin, even coats and allow each coat to dry completely before applying the next one. You may need to apply several coats of paint to achieve the desired color and coverage.
Step 5: Adding Decorative Elements
Once the paint has dried, it's time to add some decorative elements to the can. There are countless ways to decorate a paint can, depending on your personal style and the theme of your project. Here are some ideas to get you started:
- Stenciling: Use stencils to create patterns or designs on the can. You can find a wide variety of stencils at your local craft store or online. Simply place the stencil on the can and apply paint or ink over it using a brush or a sponge.
- Decoupage: Decoupage is a technique that involves gluing paper or fabric onto a surface and then sealing it with a clear coat of varnish or glue. You can use decoupage to add images, patterns, or textures to the can.
- Ribbon and Bow: Add a ribbon or a bow to the can for a touch of elegance and charm. You can use different types of ribbon, such as satin, grosgrain, or organza, depending on the style of your project.
- Embellishments: Add some embellishments, such as beads, rhinestones, or buttons, to the can to make it more unique and eye-catching. You can use glue or hot glue to attach the embellishments to the can.
Step 6: Finishing Touches
After adding the decorative elements, it's time to add the finishing touches to the can. This may include adding a handle, a lid, or a label to the can, depending on the purpose of the project.
If you're using the can as a storage container, you may want to add a handle to make it easier to carry. You can use a piece of rope, a chain, or a metal handle to create a handle for the can.
If the can has a lid, you can decorate it in the same way as the can itself or add a label to indicate what's inside the can. You can use a label maker or print out a label on your computer and attach it to the lid using glue or tape.
Step 7: Using Your DIY Project
Once you've completed your DIY project, it's time to put it to use! Depending on the design and purpose of the project, you can use the painted can as a storage container, a planter, a decorative item, or even a gift.
If you're using the can as a storage container, you can use it to store small items, such as pens, pencils, buttons, or jewelry. You can also use it to organize your craft supplies, such as yarn, beads, or fabric.
If you're using the can as a planter, you can fill it with soil and plant a small plant, such as a succulent or a herb. Make sure to drill some drainage holes in the bottom of the can to prevent the plant from drowning.
If you're using the can as a decorative item, you can place it on a shelf, a table, or a mantel to add a pop of color and personality to your living space. You can also use it as a centerpiece for a party or a special occasion.
Conclusion
Making a DIY project with a paint can is a fun and rewarding way to express your creativity and add a personal touch to your living space. With a little bit of imagination and some basic DIY skills, you can transform a plain paint can into a unique and useful item.
As a paint can supplier, I'm always happy to help my customers find the right paint can for their DIY projects. If you have any questions or need more information about our products, please don't hesitate to contact us. We're here to help you bring your creative ideas to life!
References
- Crafting magazines and websites for DIY project inspiration.
- Paint and hardware stores for information on paint and other materials.